If you're using M4r as an iPhone ringtone but can't add it via your computer, you can use the professional GarageBand tool to help you add m4r to your iPhone. This tool doesn't require iTunes, so it's also a great choice for those who want to add M4r to iPhone without iTunes. First, you need to download GarageBand on your iPhone and make sure the song or audio clip in M4r format is available for use. Then follow the guide below to add M4r to your iPhone step by step:
Step 1. Open GarageBand and tap + and "Create new song." When prompted for the recording type, select AUDIO RECORDER.
Step 2. After creating a new song project, switch to track view instead of the recording interface by tapping the multitrack button.
Step 3. Tap the loop icon in the top right corner, select Music if you downloaded (or synced) it through the Music app. Or select Audio Files if the m4r song file is in Files (iCloud Drive, Dropbox).
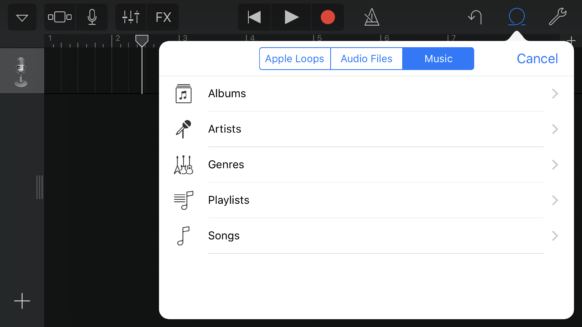
Step 4. Navigate to the source audio file, tap and hold the button and drag the song or audio file onto the track in GarageBand. Trim and cut the songs as desired, and remember that ringtones must be no longer than 30 seconds.
Step 5. Tap the inverted triangle in the top left corner and return to the "My Songs" list. This will save your project and prepare it for export.
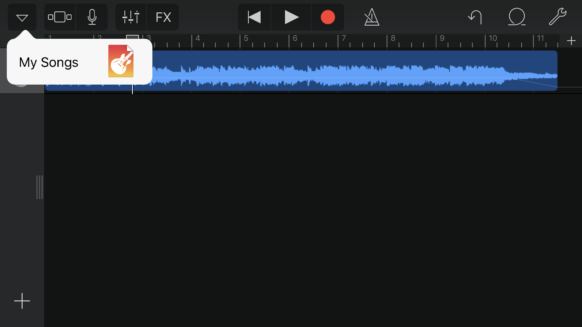
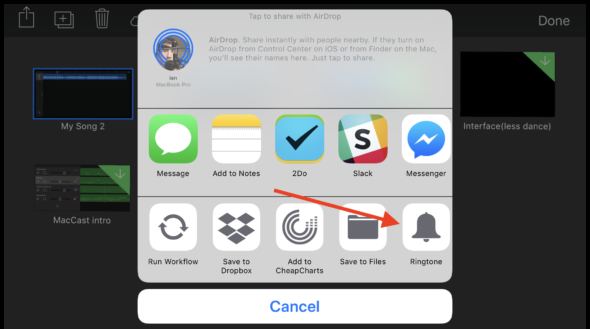
Step 6. Tap and hold the project (most likely named "My Songs") until it enters wiggle mode. Tap the share icon in the top left corner to open the share sheet. Tap "Ringtone" to begin the export process.
Step 7. Set the track name as you'd like it to appear in settings when selecting the ringtone. Then tap the "Export" button.
Step 8. Go to Settings > Sounds & Haptics > Ringtone to check the new ringtone you just added to your iPhone.
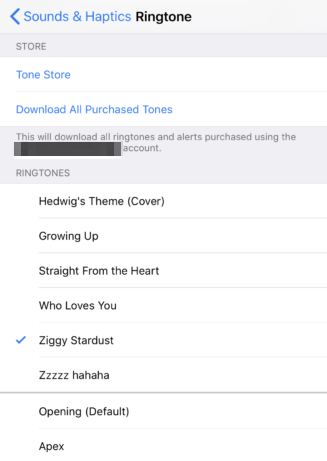
Now you can successfully add M4r ringtones to your iPhone even without using a computer or iTunes. After adding them, you can set your own M4r ringtone on your iPhone.